Learn how to set up a Linux based server that we can later use to deploy our web apps and make them accessible to our users. First we will choose a server provider based on our needs and then create a new server. We will set up the server using an automated process or manual steps.
At the end of this guide you will have a running server with Docker installed. In the next guide we will then deploy your app to that server based on your framework and language.
Choose a Server (VPS) Provider
Before we can set up our Linux server we have to choose a provider that offers a VPS that fits our needs. In the beginning a small server should be enough to deploy our apps and websites and make them accessible to our first users. At later points we can then scale the server.
Some common VPS providers are Netcup and Hetzner. There are more but for the rest of the guide we will use Hetzner. You can follow the referral links to:
- Netcup
- Hetzner
- For other options check this reddit thread.
The thing I like about Hetzner is that they are using clean images, Hostinger for example already has some stuff pre-installed.
Set up a Linux Server (VPS)
Before we create a server we will generate a public-private key pair locally, so that we can easily access our server from the get-go.
For that you open the terminal on your PC.
ssh-keygen -t ed25519
Then we run and copy the contents of the file for later (windows maybe open it with vscode or similar):
cat ~/.ssh/id_ed25519.pub
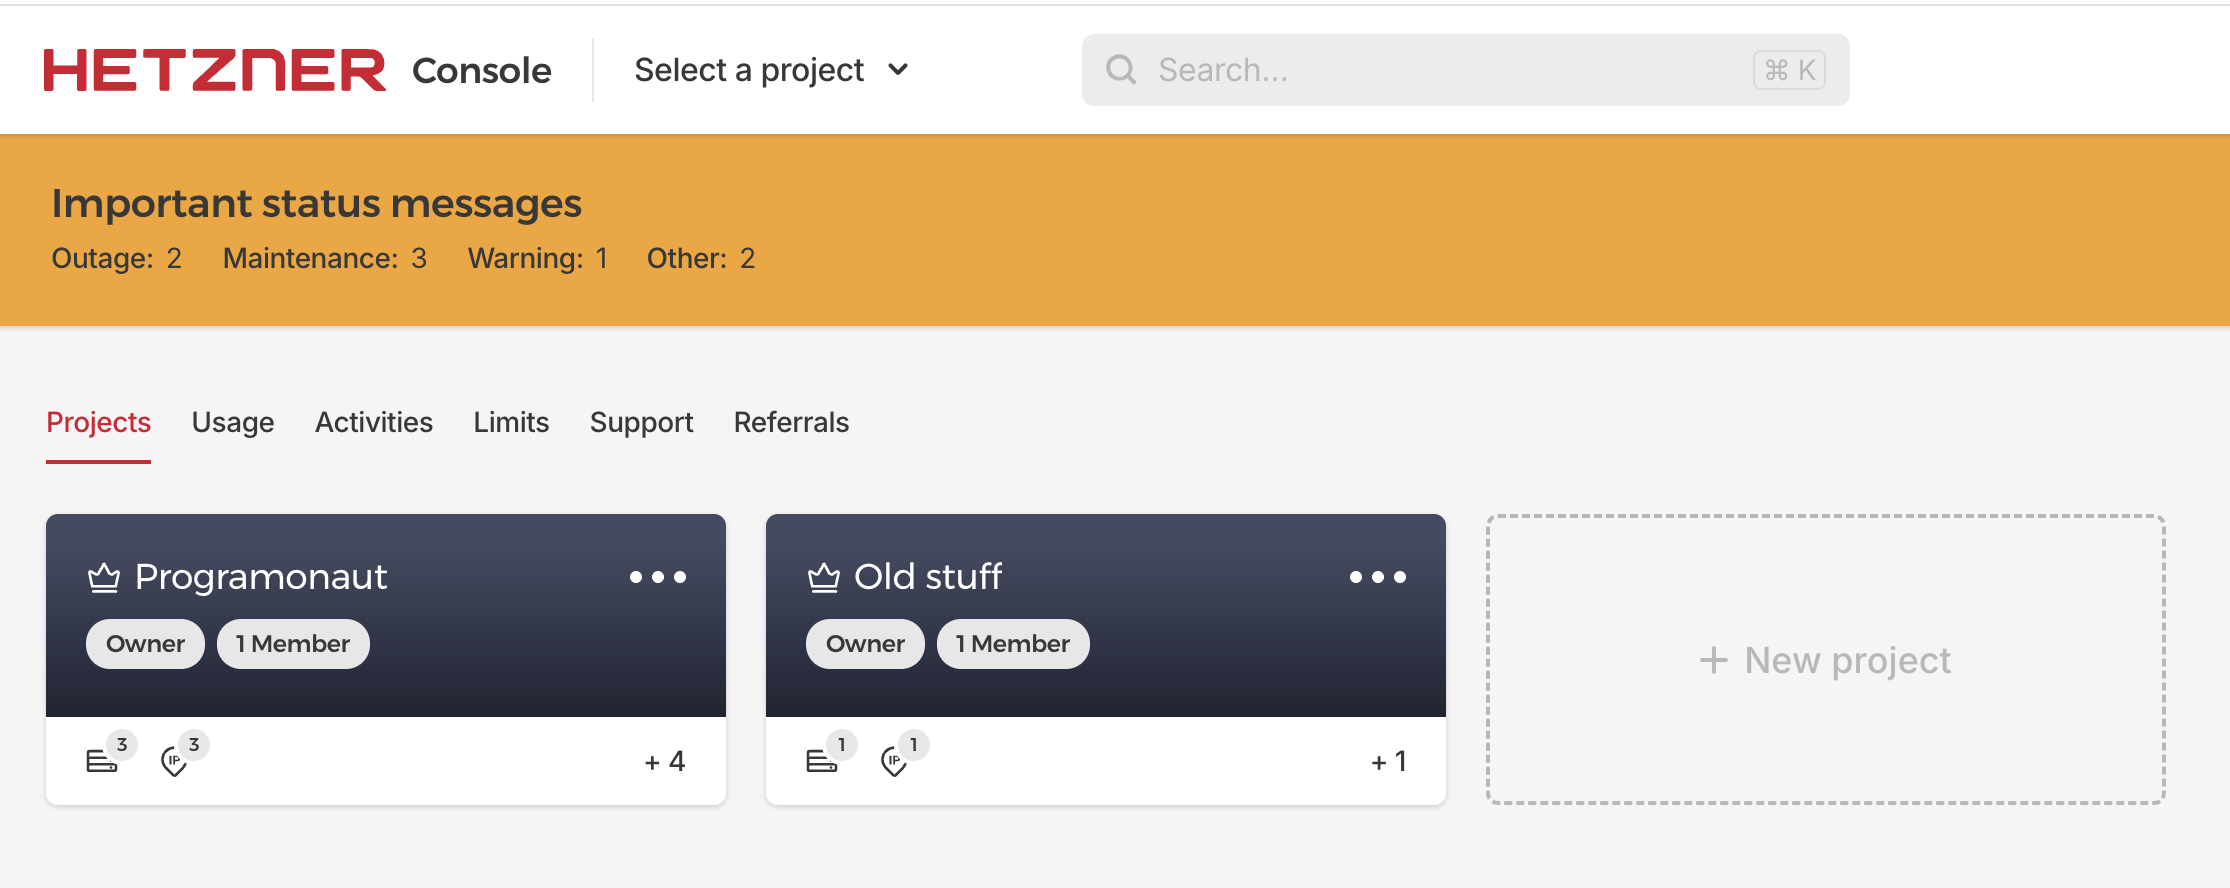
To set up a Linux VPS we need to enter the Hetzner cloud console. In the cloud console you can either create a new project or choose an existing one:
After creating/entering a project we will arrive on the dashboard screen. Here we click on 'Create resource' > 'Servers'. We then arrive on the configuration screen:
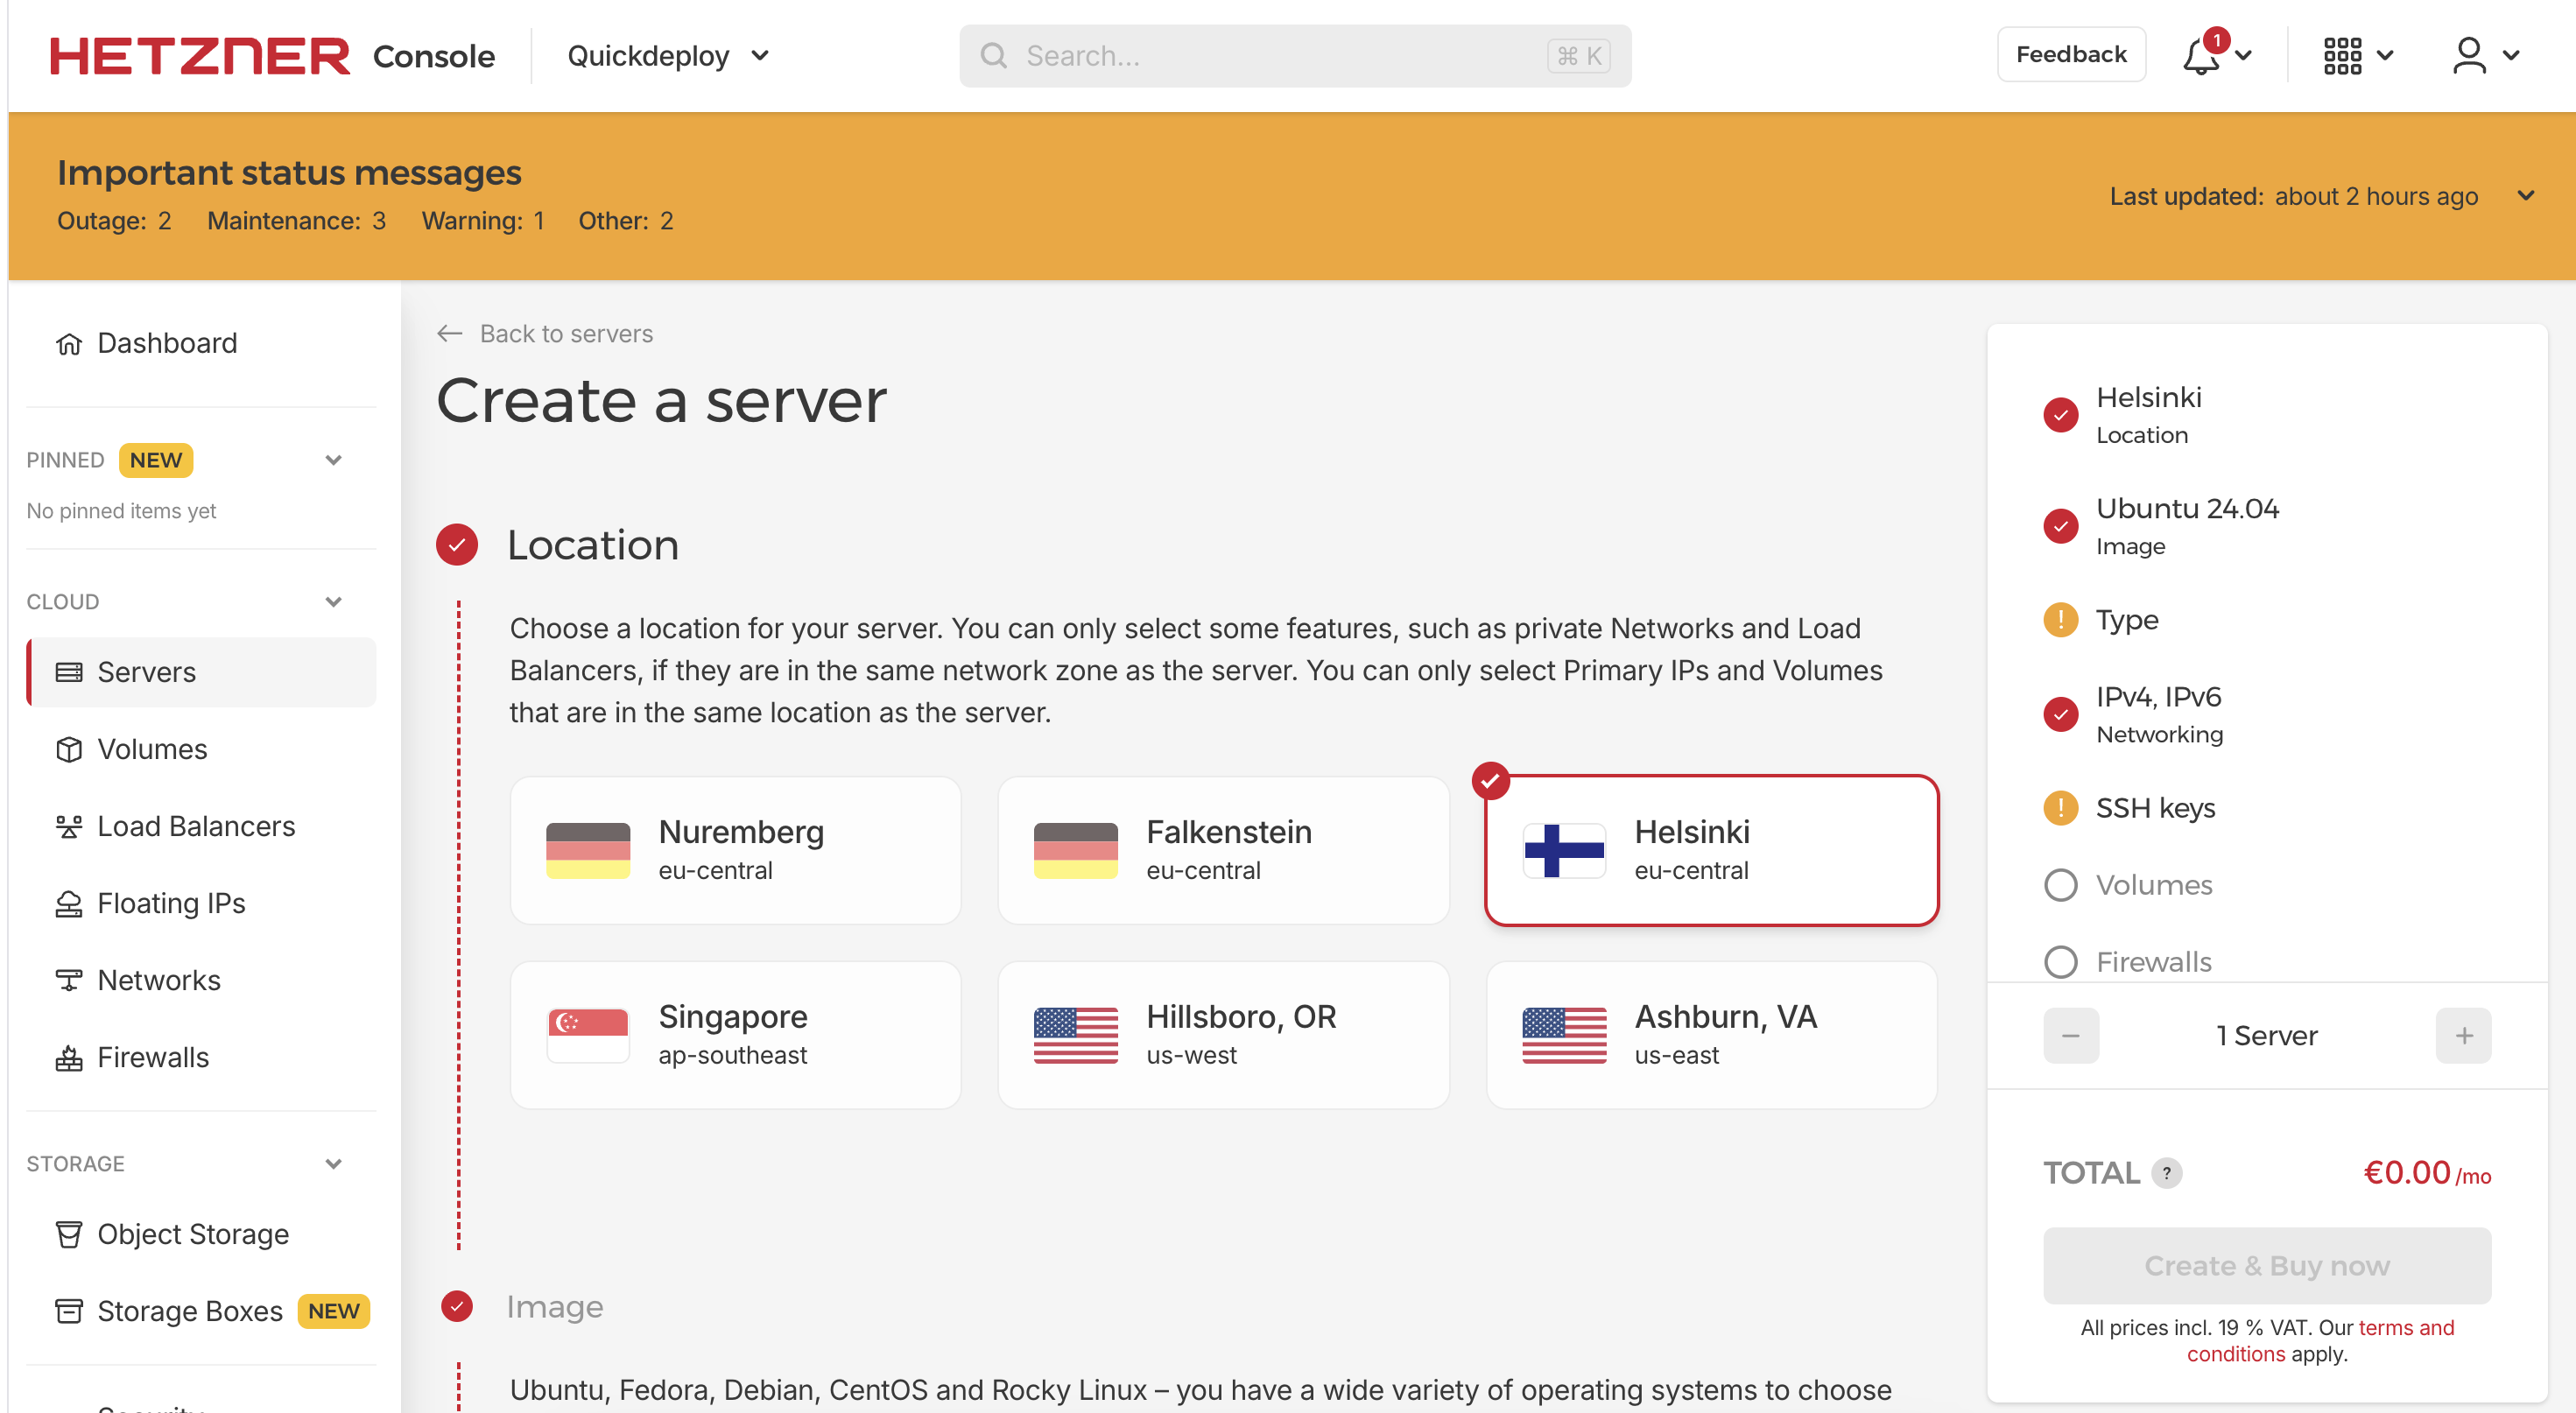
Here we choose the following options:
- Location closest to you e.g. Nuremberg
- Ubuntu
- Shared vCPU -> x86 -> the RAM and core you need for your project (e.g. 4 cores 8gb RAM)
- Networking unchanged
- Then we add the Public Key that we copied before
- No Volumes
- No Firewalls
- No Backups
- No Placement Groups
- No Labels
Next we will add a cloud init. The cloud init will automatically install Docker for you and also set up a user that you can use to access your server that isn't root. Before running the server creation finish the three todos. If you prefer to install Docker manually you can also remove the packages and runcmd section and follow the steps in the next section:
#cloud-config

# Add a user
users:
# TODO: replace with your username
  - name: yourusername
    groups: users, admin
    sudo: ALL=(ALL) NOPASSWD:ALL
    shell: /bin/bash
    ssh_authorized_keys:
	 # TODO: replace with your public key
      - "..."

# Update apt package index
package_update: true
package_upgrade: true

# Install required packages
packages:
  - apt-transport-https
  - ca-certificates
  - curl
  - gnupg
  - lsb-release
  - software-properties-common

# Run commands to install Docker
runcmd:
  # Add Docker's official GPG key
  - curl -fsSL https://download.docker.com/linux/ubuntu/gpg | gpg --dearmor -o /usr/share/keyrings/docker-archive-keyring.gpg

  # Add Docker repository
  - echo "deb [arch=$(dpkg --print-architecture) signed-by=/usr/share/keyrings/docker-archive-keyring.gpg] https://download.docker.com/linux/ubuntu $(lsb_release -cs) stable" | tee /etc/apt/sources.list.d/docker.list > /dev/null

  # Update apt package index again
  - apt-get update

  # Install Docker Engine, containerd, and Docker CLI
  - apt-get install -y docker-ce docker-ce-cli containerd.io docker-buildx-plugin docker-compose-plugin

  # Start and enable Docker service
  - systemctl start docker
  - systemctl enable docker

  # Add ubuntu user to docker group
  # TODO: adjust username
  - usermod -aG docker yourusername

  # Verify Docker installation
  - docker --version

# Optional: Set timezone
timezone: UTC

# Optional: Configure automatic security updates
package_reboot_if_required: true

# Write additional files if needed
write_files:
  - path: /etc/docker/daemon.json
    content: |
      {
        "log-driver": "json-file",
        "log-opts": {
          "max-size": "10m",
          "max-file": "3"
        }
      }
    permissions: '0644'

# Final message
final_message: "Docker installation completed! System is ready."
Finally give your server a speaking name and then click on 'Create & Buy now'. Afterwards you have to wait a bit and then you will have the server looking like this:

You can now on locally enter:
ssh yourusername@ip
That's it! With that you've set up your server!
Install Docker to Deploy Your Web Apps
If you did not use the provided cloud init you can set up Docker using the following commands. First we install the required packages:
# Add Docker's official GPG key:
sudo apt-get update
sudo apt-get install ca-certificates curl
sudo install -m 0755 -d /etc/apt/keyrings
sudo curl -fsSL https://download.docker.com/linux/ubuntu/gpg -o /etc/apt/keyrings/docker.asc
sudo chmod a+r /etc/apt/keyrings/docker.asc

# Add the repository to Apt sources:
echo \
"deb [arch=$(dpkg --print-architecture) signed-by=/etc/apt/keyrings/docker.asc] https://download.docker.com/linux/ubuntu \
$(. /etc/os-release && echo "${UBUNTU_CODENAME:-$VERSION_CODENAME}") stable" | \
sudo tee /etc/apt/sources.list.d/docker.list > /dev/null
sudo apt-get update
Next we install docker:
sudo apt-get install docker-ce docker-ce-cli containerd.io docker-buildx-plugin docker-compose-plugin
Now we check that the basic install works:
sudo docker --version
Next we will make docker executable without sudo:
sudo groupadd docker
sudo usermod -aG docker $USER
newgrp docker
And we check that it works:
docker --version
Next Steps
With that we have set up the foundation for hosting our projects on our own VPS. The next steps to deploy our apps is based on the language and framework we use. Choose the ones you are using/want to use to deploy your app and follow the steps: